Upload the image here and immediately change the image description parameter. |
- "She's not as dumb as James. There's no way to attack her home without first taking hold of her stronghold at Arborea." – Pyro, The Chasm Widens (Intermission)
- Mission Giver: Pyro
- Location: Arborea
- Map Creator: David Msika
- New Spell: Rain of Fire
- New Creature: Warmonger

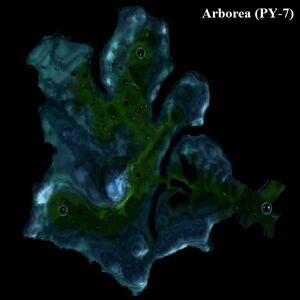
Map of Arborea (full image)
Starting Setup[]
Objectives[]
Walkthrough[]
- MITHRAS: Arborea, the home of the ents.
- ELDRED: It would soon be home only to chaos and destruction.
One on Two[]
On Pyro's orders, you are sent to Arborea to attack Persephone. Two enemy wizards oppose you: Shakti and Abraxus. Unlike the previous mission, you will only have a very short time before the enemies are breathing down on your neck, so act fast. Send your Warmonger and Faestus (if you have him) ahead of you to dispose of a small ambush, namely a Mutant and half a dozen Rangers, while you build the first manalith; then hurry to build the second manalith and then convert the souls before Abraxus arrives.
This is a purely defensive mission, so Guardian all your creatures to your second manalith. Summon several Warmongers and Bombards, in particular; these two destructive units will help a lot in stemming the tide of enemies. Abraxus is the first to attack, and leading the charge is Lord Surtur, if he hasn't been killed earlier in the campaign. Lord Surtur is a formidable opponent who will need the focused fire of all of your troops to bring down; kill him quick or he'll make short work of your more fragile units. Cast your spells (Firewall, Explosion, Rain of Fire) quickly to weaken the horde of other Servants that follow up: Flurries, Brainiacs, other Storm Giants and so on.
Shakti is not far behind; her army includes Mutants, Ents and other Faithful. The Mutants can kill your guards surprisingly fast while they are preoccupied with the rest of the enemies, so watch out for that. Order your Bombards to shoot down the Mutants (they kill faster, after all) or summon some Firefists or other brawlers to dispose of them.
If you had any luck, the enemies left at least some souls behind as you killed them. Convert them; they're going to come back for them fast. (Prioritise Shakti's creatures, though.)
One on One[]
After approximately 15 minutes, Abraxus will reveal that she must leave, as ordered by her master Stratos, and tells Shakti to handle you alone. This will take some pressure off you; in fact, defending might become quite easy depending on your performance against Shakti so far.
Now, you can move out and attack Shakti, taking over her manaliths one by one, or you can just stay put. Either way, half an hour after the start of the game, Shakti will be gone too: mysteriously, a lightning bolt strikes her, and she is killed for good. With that, the mission is complete!
A Quicker Way (Exploit) ((Fail on Map Developer's Side))[]
There is another way to complete this mission really quickly, although this is arguably "exploit-ish" as the only certain way to know about it is to look inside the editor. Basically, the mission is triggered to end as soon as you approach Shakti's altar. All you need to do is to speed towards her altar right away! Even if Abraxus hasn't left yet, you just need to cross a certain invisible line (which is behind her final manaliths) and the cinematic of Shakti's death will trigger right away, making you win the mission. A rather cheesy way of winning the mission, but much quicker indeed. If you want to do it in a bit more honorable way, wait until Abraxus' disappearance before doing this.
| Previous Mission: | Mission Category: | Next Mission: |
| Pyro's Missions | Interlude |
| Missions in Sacrifice | |||||||||
| Missions | 1 | 2 | 3 | 4 | 5 | 6 | 7 | 8 | 9 |
| Persephone | PE-1 | PE-2 | PE-3 | PE-4 | PE-5 | PE-6 | PE-7 | PE-8 | PE-9 |
| James | JA-1 | JA-2 | JA-3 | JA-4 | JA-5 | JA-6 | JA-7 | JA-8 | JA-9 |
| Stratos | ST-1 | ST-2 | ST-3 | ST-4 | ST-5 | ST-6 | ST-7 | ST-8 | ST-9 |
| Pyro | PY-1 | PY-2 | PY-3 | PY-4 | PY-5 | PY-6 | PY-7 | PY-8 | PY-9 |
| Charnel | CH-1 | CH-2 | CH-3 | CH-4 | CH-5 | CH-6 | CH-7 | CH-8 | CH-9 |
| Intermissions | IM-1 | IM-2 | IM-3 | IM-4 | IM-5 | IM-6 | IM-7 | IM-8 | IM-9 |
| Others | Prologue | The Wanderer's Tale | Respite | The Crucible | ||||||||